Using the Web Interface
Goal: Enable the built-in web server, log in to the management UI, and use it to inspect status, run queries, change settings, and manage TLS certificates.
Prerequisites
There are two distinct steps the names of which look almost identical and get mixed up regularly — make sure you read both before you start:
| Command | What it does | When to run |
|---|---|---|
nscp web install |
Writes the configuration to enable the WEBServer module (roles, users, port, password) |
Once, when first turning on the web server. |
nscp web install-ui |
Downloads and unpacks the React UI bundle (NSCP-Web-<version>.zip) into web-path |
On Linux: after every package install. On Windows MSI: not needed. |
The web server (REST API + the static-file controller) lives in the
WEBServer module. nscp web install flips it on; if you prefer to do it
by hand:
[/modules]
WEBServer = enabled
You also need a password for the admin user (set during install or with
nscp settings --path /settings/default --key password --set ...) and the
machine must be reachable on port 8443 from your browser.
Note
Linux only: the .deb / .rpm packages do not ship the React UI
bundle. Without nscp web install-ui the daemon boots fine and the REST
API works, but / serves a small built-in placeholder pointing you at
nscp web install-ui instead of the real UI. The Windows MSI bundles
the UI inline, so this extra step does not apply there.
Enabling the Web Server
The web server requires a bit of configuration. To make this simple there is a command line tool which can set this configuration for you.
nscp web install
WARNING: No password specified using a generated password
Enabling WEB access from 127.0.0.1
Point your browser to http://localhost:8443
Login using this password RANDOM_PASSWORD
What this does is add the following configuration:
[/settings/WEB/server/roles]
legacy = legacy,login.get
client = public,info.get,info.get.version,queries.list,queries.get,queries.execute,login.get,modules.list
full = *
view = *

[/settings/WEB/server/users/admin]
role = full

[/settings/default]
password = gKn6egFIKgo38bu6ZPN06d6pUueYVy1M
allowed hosts = 127.0.0.1

[/modules]
WEBServer = enabled

[/settings/WEB/server]
port = 8443
Next up we need top restart NSClient++:
nsclient service --restart
Installing the web UI bundle (Linux only)
On Linux the .deb / .rpm packages contain the daemon but not the React
UI. Fetch the bundle that matches the running daemon version:
sudo nscp web install-ui
sudo is required because the install path (/usr/lib/nsclient/web by
default) is root-owned. The command downloads
NSCP-Web-<version>.zip and its .sha256 companion from the project's
matching GitHub release, verifies the checksum, and unpacks the bundle into
${web-path}. An install manifest is written to
${web-path}/.nscp-web-manifest.json so a later uninstall-ui only removes
files the installer actually placed there — anything the operator dropped in
themselves survives.
Status / removal:
sudo nscp web ui-status                # version, source URL, file count
sudo nscp web uninstall-ui             # remove the bundle (manifest-driven)
sudo nscp web install-ui --force       # overwrite an existing bundle
Offline / air-gapped install
If the host has no outbound internet access, download
NSCP-Web-<version>.zip (and optionally NSCP-Web-<version>.sha256) on a
machine that does, copy them across, and:
sudo nscp web install-ui --from /tmp/NSCP-Web-<version>.zip
A sibling .sha256 file is verified when present; without one the installer
prints a warning and proceeds — you opted into trusting a local path.
What the daemon serves before install-ui
Without the bundle installed, the WEB server still boots, the REST API still
answers, and any browser request to / (or any page navigation) returns a
small built-in HTML placeholder that explains how to fix it. So a freshly
apt install-ed host that you intend to manage only via NRPE / NSCA / the
REST API needs no further action; the install-ui step is only for
operators who want the browser UI.
Logging in to the Web Interface
After this we can access the web interface you can open a web browser and navigate to https://localhost:8443/.
Then you are met with a scary looking dialog (in your language) about an untrusted certificate:

This is normal and due to the fact that to use TLS (HTTPS) NSClient++ generates a self-signed certificate on startup.
If you have a CA in your organization or you can use a tool like mkcertto easiily generate a cutom certificate.
We will cover this later in this guide.
Next up we need to login:
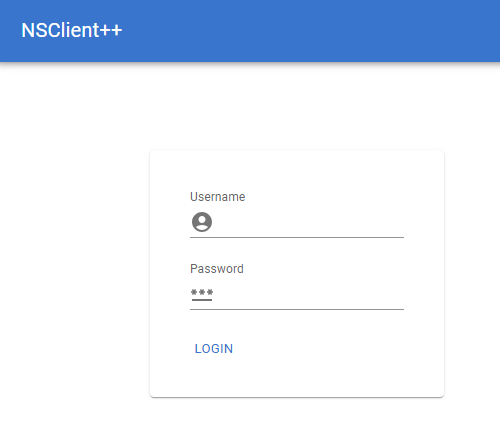
Here you can login with the username admin and the password you set during installation.
If you do not remember the password you can reset it using the command line:
nscp settings --path /settings/default --key password --set your_password
If you fail to log in, ensure you are not running a service in the background, or that you have restarted since changing the password.
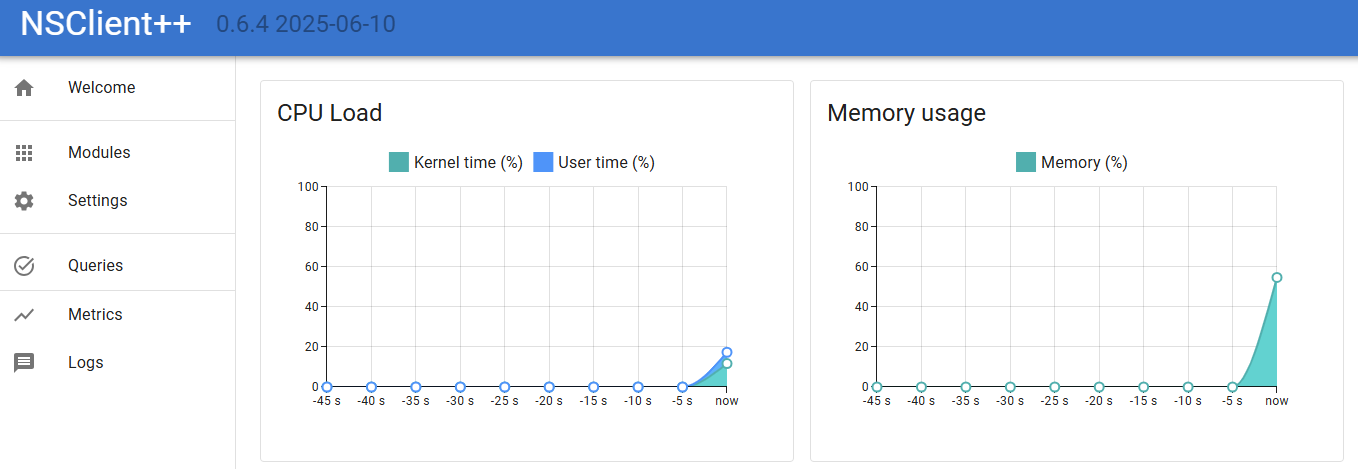
Checking things from the Web Interface
The next step is to start checking things. NSClient++ is a monitoring agent and as such it is designed to check various aspects of your system. This is done using modules which provide various checks and commands. Modules can be loaded and unloaded at runtime and they provide various features and functionality.
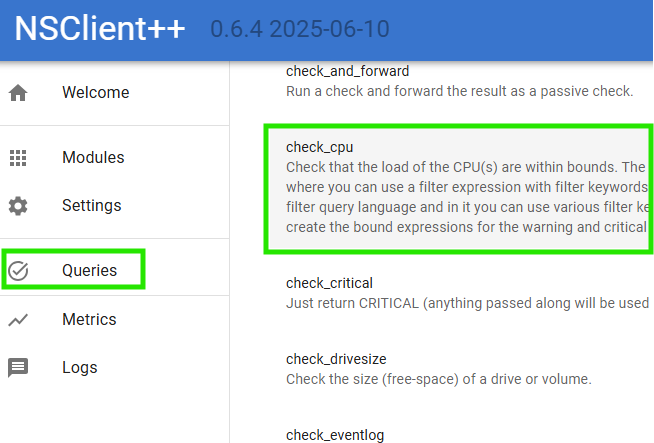
If we click on Queries in the web interface we will see a list of available queries.
In the list you will find check_cpu so lets try it out.
Then you are met with a screen which looks a bit like this:
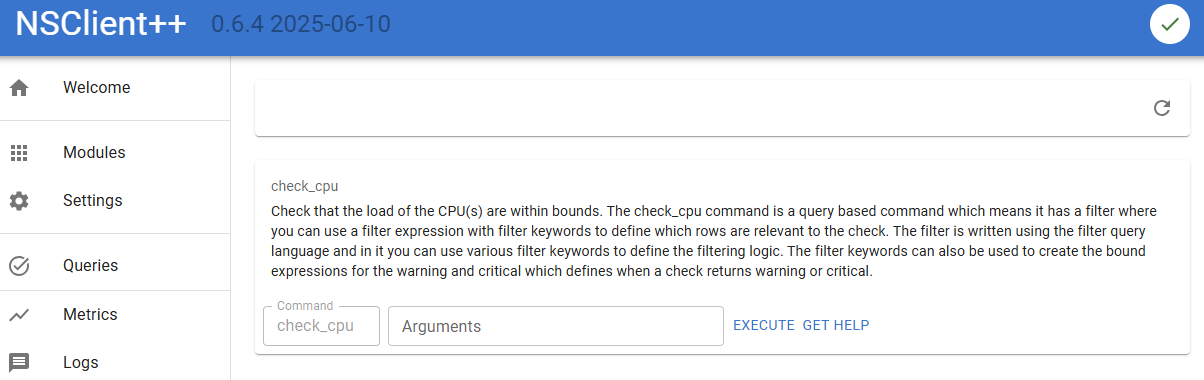
Here we can:
- Click
Executeto run the check. - Click
Get Helpto get help on how to use the check. - Enter
Argumentsto pass arguments to the check.
Let start by click Execute and see what happens.
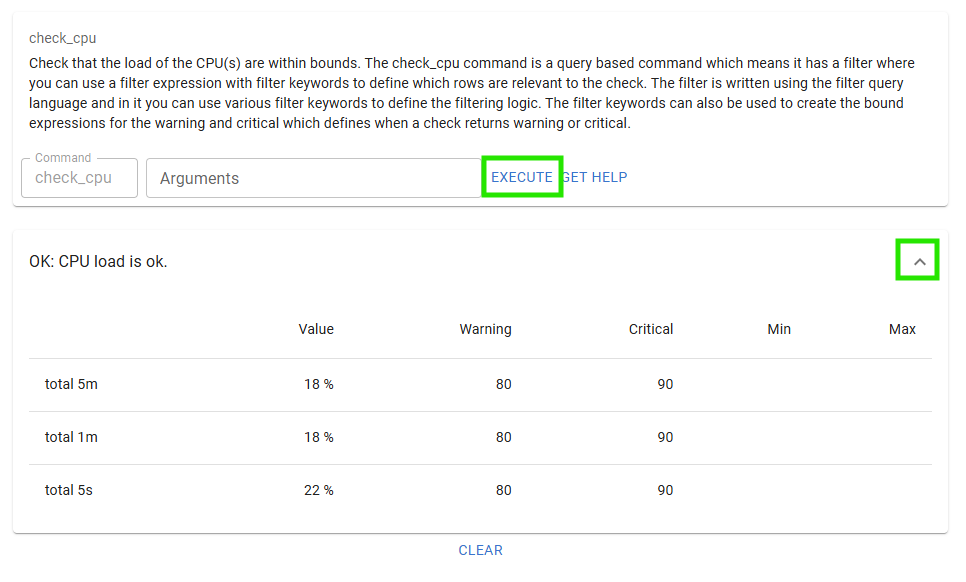
If you click the Expand chevron you will also see the performance data from the check.
Next up lets click Get Help to see how to use the check.
At the very end you can find the cores options, so lets try that out.
Enter coresin the arguments field and click Execute again.
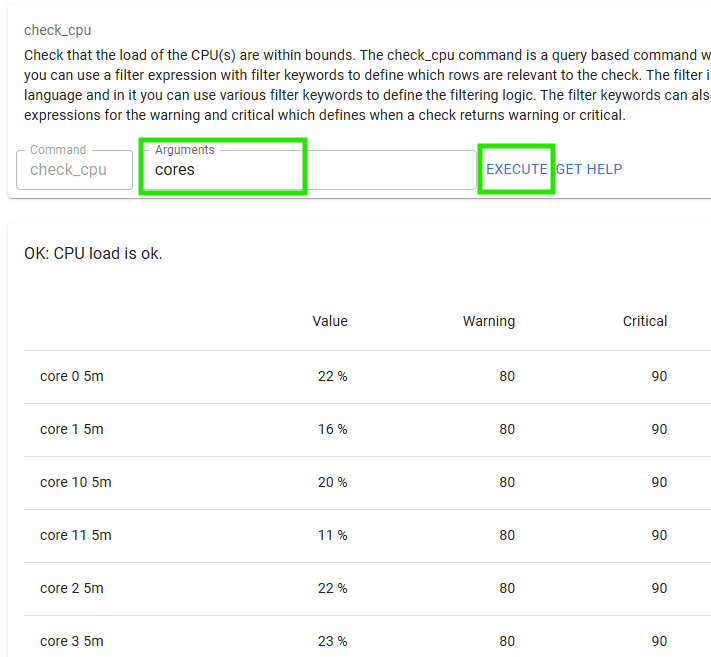
And there you have it the CPU load for each core.
Loading modules via Web Interface
Before we loaded a module using the command line.
Now we will load a module using the web interface.
To do this we will click on Modules in the web interface.
Here you will see a list of available modules.
Click the CheckNet module to configure that module.
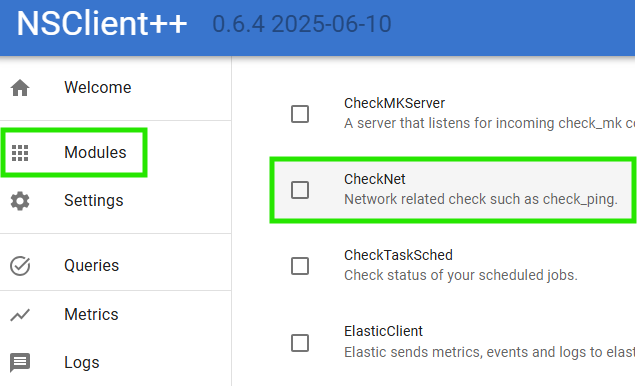
Here we can see that the module is neither loaded nor enabled.
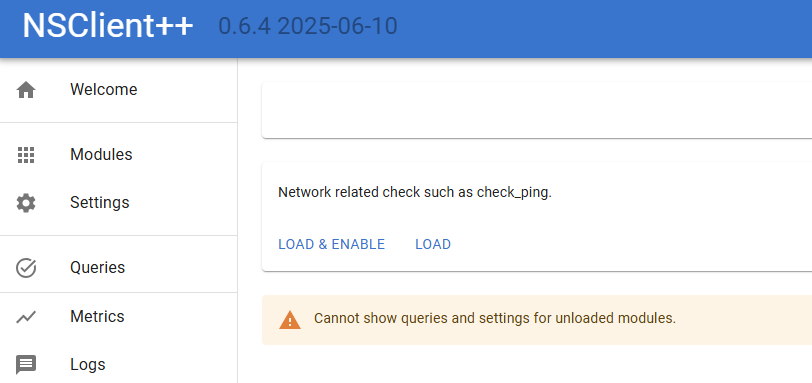
A quick word about the difference between loaded and enabled.
- Loaded means that the module is loaded into memory and can be used.
- Enabled means that the module is configured to be loaded when NSClient++ starts.
Normally you want the module to be both loaded and enabled.
So lets click the Load & Enable button to load the module.
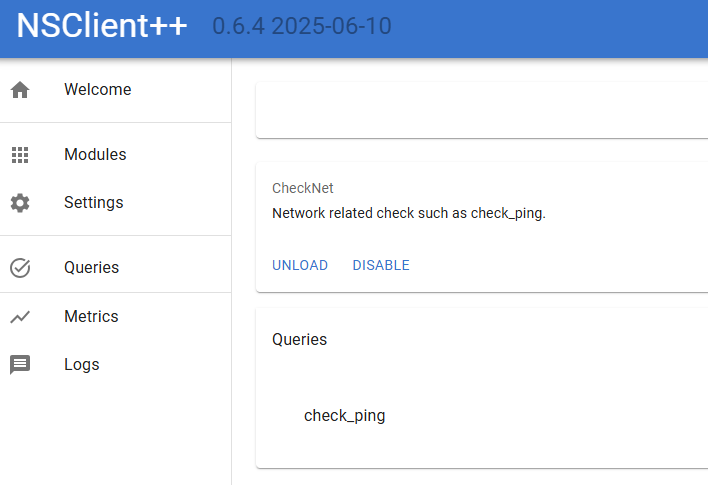
Now we can see the queries provided by the module.
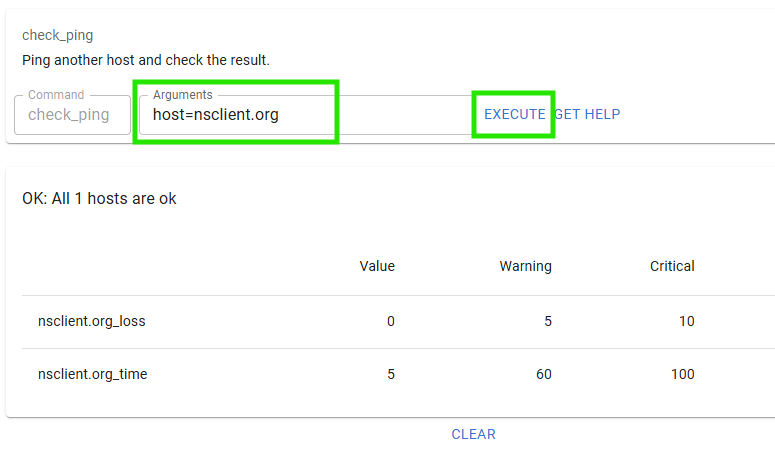
Lets try out the check_ping query which checks the ping response time to a host.
As you noticed this is the same dialog as we saw before when we executed the check_cpu query.
So lets try it out by entering host=nsclient.org in the Arguments field and clicking Execute.
Configuration via Web Interface
The web interface also allows you to configure NSClient++.
To do this you can use the Settings tab but a simpler way is to use the settings widget on the module dialog as that only have settings relevant for a given module so that is what we will do.
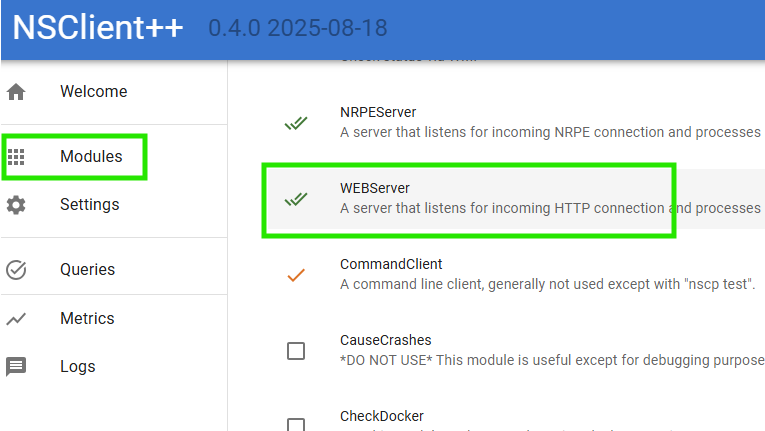
So lets click Modules in the web interface and then click on the WEBServer module.
 .
.
Once you are here Click Settings and then expand /settings/WEB/server to show the port setting.

You should now be able to change the port to 1234 and click save:
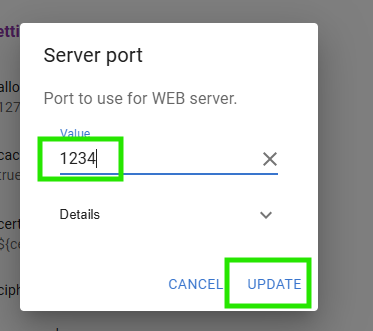
After this you should get a popup asking you to save and update the settings.
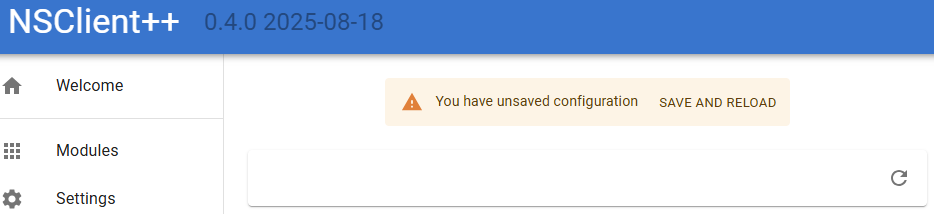
If you click Save and reload the service will restart and the web server will now be served on port 1234 instead.
So navigate to http://localhost:1234/ and you should see the web interface again.
Adding certificates to NSClient++
By default, NSClient++ generates a self-signed certificate on startup.
This is fine for testing but in a production environment you will want to use a certificate signed by a trusted CA.
As we do not have a CA in this example we will create our own CA using the mkcert tool to simulate CA here.
First we need to install mkcert.
You can find the installation instructions on the mkcert GitHub page.
Once you have installed mkcert you can create a CA and generate a certificate for localhost.
mkcert -install
mkcert localhost -cert-file c:\program files\nsclient++\security\server.pem, -key-file c:\program files\nsclient++\security\server.key
NOTICE This will install the root certificate on your local machine.
This will install the root certificate and generate two certificates server.pem and server.key.
Next we need to configure NSClient++ to use these files.
We can do this using the command line (or you can use nscp web install as we did above):
nscp settings --path /settings/WEB/server --key certificate --set "${certificate-path}\server.pem"
nscp settings --path /settings/WEB/server --key "certificate key" --set "${certificate-path}\server.key"
If we restart NSClient++:
nscp service --restart
We should now have a valid certificate when we visit the web interface on https://localhost:8443/.
If you wish to remove the root certificate you can do so using:
mkcert -uninstall
Using check_nsclient Command
check_nsclient validates the NSClient++ TLS certificate against a CA file
you pass with --ca. The simplest choice is the bundle NSClient++ already
maintains for you — windows-ca.pem contains every Windows trusted root,
including the mkcert CA we just installed:
$ check_nsclient nsclient auth login --password PASSWORD --ca "c:\program files\nsclient++\security\windows-ca.pem"
Successfully logged in

# or, if you don't care about validating the certificate:
$ check_nsclient nsclient auth login --password PASSWORD --insecure
Successfully logged in
This command will connect to a local NSClient instance and authenticate using the provided password and CA certificate. The password and key will be store in your local credential store. To logout (and remove password and key from credential store) you can run:
check_nsclient nsclient auth logout
Next up we can try to connect using the ping command:
check_nsclient nsclient check ping
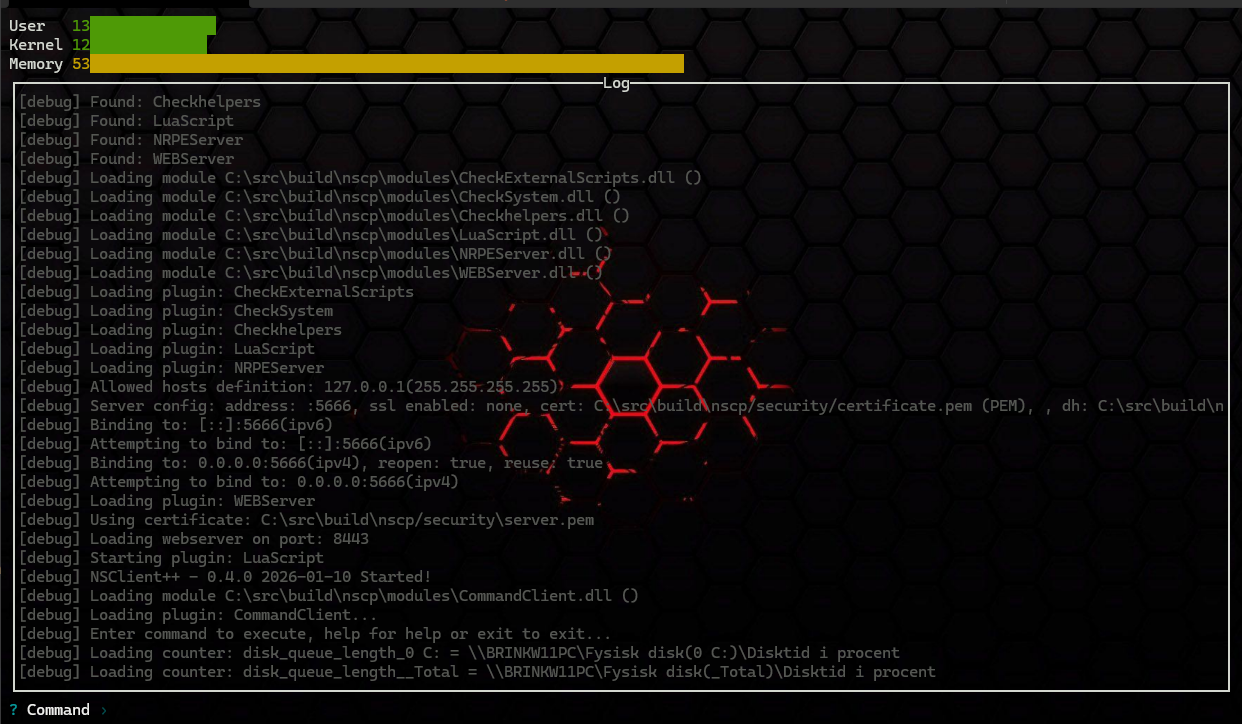
Successfully pinged NSClient++ version 0.4.0 2026-01-10
This tool can also be used to connect to remote NSClient++ instances by providing the --url option:
$ check_nsclient nsclient auth login --help
Login and store token

Usage: check_nsclient.exe nsclient auth login [OPTIONS] --password <PASSWORD> [ID]

Arguments:
  [ID]  Profile ID to store the token under [default: default]

Options:
      --url <URL>            NSClient++ URL [default: https://localhost:8443]
      --username <USERNAME>  Username to login with [default: admin]
      --password <PASSWORD>  Password to login with
      --insecure             Allow insecure TLS connections (i.e. dont validate certificate)
      --ca <CA>              CA File to use for TLS connections
  -h, --help                 Print help
One of the benefits of the check_nsclient tool apart from having a CLI interface where you can manage NSClient is that it also has an interactive client you can use:
$ check_nsclient nsclient client
In this client you can execute queries, check status, see log and so on and so fort.
Next Steps
- Active Monitoring with NRPE — wire NSClient++ up so a Nagios-style server can poll it
- Passive Monitoring (NSCA/NRDP) — push results to your monitoring server on a schedule
- Reference: WEBServer — every web server setting in detail